Wednesday, March 11, 2009

Speedy Side Dish: Bulgur with Pine Nuts


Quick? Check.

Easy? Check.

Healthy? Check.

Here's a super healthy whole grain side dish that takes 20 minutes start to finish with very little prep or fuss...Its packed with nutrients from the whole grain and fiber filled bulgur to the protein packed pine nuts. Use low fat/low sodium chicken broth or sub with veggie broth to make it even healthier...

Bulgur with Pine Nuts
1 cup bulgur
2 cups chicken broth
2 green onions, chopped
1/4 cup pine nuts, toasted


In a large saucepan, combine the bulgur, broth and onions; bring to a boil over high heat.


Reduce heat; cover and simmer for 15-18 minutes or until broth is absorbed.


Add pine nuts and stir to combine.


Nutritional Analysis: Makes 4 servings (1/2 cup size) 1/2 cup equals 177 calories, 5 g fat (1 g saturated fat), 0 cholesterol, 29 g carbohydrate, 7 g fiber, 7 g protein.

Friday, March 6, 2009

L.O.V.E. Wraps


The husband dude is in competition training mode so he's eating eggs like a man lately. It seems as though my fridge is spilling over with hard cooked eggs. The weather was so springy last night that I wasn't really feeling a heavy dinner so I grabbed a couple of his hard cooked eggs from his stash and figured I would make some egg salad wraps with the tortillas I had just made. Egg salad is easy and you can add whatever you like to it-I usually just add some mayo, mustard finely chopped onions and a bit of s&p to mine but I thought I'd see if I could find something a little different.

I came across Ellie Krieger's recipe for L.O.V.E wraps...fitting for the whole Grow Food LOVE thing, eh?

Its simple, not much different from how I normally make my egg salad. I didn't have any red peppers on hand so I did without those and I added about two pinches of shredded Colby-jack cheese to mine.

They turned out really tasty-a nice light warm weather lunch or even dinner for those nights that cooking isn't high up on the list of things you want to do.


L.O.V.E Wraps (Lettuce Onion Veggie Egg)
8 hard boiled eggs
4 teaspoons mayonnaise
1 teaspoon Dijon mustard
2 tablespoons fresh chives, finely chopped
Salt and pepper
4 pieces whole-wheat wrap bread (9 inches in diameter) **Used homemade tortillas**
1 red bell pepper, cut into strips
12 thin slices red onion
8 leaves romaine lettuce, torn into pieces (about 1/2 cup)

Directions
Dice 4 whole eggs and 4 egg whites and put into a small bowl. Add the mayonnaise and mustard and stir with a fork, mashing somewhat for desired consistency. Stir in chives and season with salt and pepper. Place wrap bread on a plate and spread the egg salad in the middle. Top with the peppers, onion slices and the lettuce. Fold into a wrap sandwich.
***I actually halved this recipe and it was enough to make FOUR mini wraps with smaller taco sized tortillas.***

How to Make "Rustic" Homemade Tortillas

1. Get some flour, oil, baking powder, salt and water.

2. Heat a griddle or skillet to about 375 degrees or you know hot enough to make water sizzle when you flick some droplets into the pan.

3. Hire a cute rolling pin operator like the one pictured here:


4. Follow this recipe:

HOMEMADE FLOUR TORTILLAS

2 cups of white flour
1 1/2 tsp. baking powder
1 tsp. salt
2 tsp. vegetable oil
3/4 cup warm water

~Combine the flour, baking powder and salt in a bowl. In another bowl combine the warm water and oil.
Add the water/oil mixture to the flour mixture, one tablespoon at a time and mix the dough with a fork. Once the water is mixed in, add another tablespoon of water and repeat the process until all the water is mixed into the dough.
The dough will be sticky.

~Lightly flour a wooden cutting board and knead the dough. If the dough sticks to the cutting board while kneading, scrape up the dough and dust the board with a little flour and continue kneading. Eventually the stickiness will go away and you will have a nice smooth dough.

~Place the dough back into the bowl and cover it with a damp towel or damp paper towel. Let the dough rest for 20 minutes.

~Divide the dough into golf-ball-size balls by pinching off the dough with your thumb and fore finger. Form each ball into a nice ball shape.
Place the balls on a flat dish making sure they don't touch each other and cover with the damp cloth. Let the dough rest again for 10 minutes.

~Preheat a skillet or cast iron pan on medium high heat. You really can't beat cast iron pans for even heat distribution and their ability to withstand high heat without warping.
Lightly dust your wooden cutting board with flour. Take one of the balls of dough and flatten it out on the cutting board to a 4 inch circle. Rub flour on your rolling pin and begin to roll out the dough starting from the center out. Roll the tortilla until it is 6 or 7 inches in diameter and about 1/8 inch thick.

~It's difficult to roll out a perfectly round tortilla so if that is important to you, you can always trim the tortilla with a knife-but really...(Insert rolling eyes here)


~Once you have rolled out the tortilla, place it on a preheated skillet. You don't need to add any oil or butter. Cook the tortilla for about 30 seconds. You will notice brown spots all over your tortilla. Flip it over and cook an additional 30 seconds.
Don't over cook it as you want the tortilla to be nice and soft.

~Keep your tortillas warm by covering them in a towel on a plate or in a tortilla warmer.


~Tortillas are best eaten hot right off the griddle, but you can refrigerate and freeze them too.
If you freeze the tortillas, wrap tightly in plastic wrap and put them in a ziplock bag. When you are ready to use them, first thaw at room temperature and then wrap them in foil and place them in a 250 degree oven for a 10 to 15 minutes.

Monday, March 2, 2009

Just a Hunka Hunka Burger Love

Presenting...LOVE Burgers!

Made these just to be sweet to the husband guy on Saturday night...he's training for another competition at the end of March so that means he's on a high protein, almost no fat and high carb diet right now that which means something decadent and sweet won't really win his heart. He's never a big sweet/pastry/baked goods kind of person anyway so I have to find other ways to show him I love him through food.

Nothing really to these babies-just ground turkey a little seasoned salt, onion powder and a couple of small dashes of cinnamon and Worcestershire sauce. Served with a little Sweet Baby Ray's BBQ sauce on the side. These would have been lovely with some caramelized onion and Swiss but like I mentioned earlier we were going with HEALTHY and LOW FAT.

I put some parchment paper down on the counter and patted the seasoned ground turkey into a rectangle that was about and inch thick and used a big heart shaped cookie cutter to cut the meat into heart shaped patties.

I also used my broiler pan and baked them in the oven so that any fat would cook out and off the burgers.

The season salt and cinnamon adds a slight sweet taste to the burgers.

Anyway, its kind of silly but the little extra touch, which didn't take anymore time than a burger would normally take to make was much appreciated by the husband guy. Just a nice little non traditional way to let my meat loving man know I love him.

Thursday, February 26, 2009

Random Journal Entry: Feb 26 09


Today was a beautiful day. It was a little bit chilly still but semi overcast-which is my FAVORITE (Strange, I know.) The network crashed at work and for about three hours we all sat around incessantly rebooting our PCs, skimming the newspapers, talking about food, creating a lottery pool and discussing what we would do with the winnings, and listening to ridiculous stories from Johnny D, our honorary window-licker and the source of much entertainment around the office.


Well after 3 hours we were all burnt out and restless and starving from all the food talk so we departed the office and went our separate ways. I headed over to Lowe's just to price some items for the garden and walked out with 60 paver bricks to use for the herb wheel garden. I scored a nice price-21 cents a piece!


Heading back to the office I saw the DQ sign yelling my name and said to hell with it and picked up a small choco cherry blizzard. Yum I haven't had DQ in awhile. I almost always get a small blizzard, but whatever is in their ice cream never allows me to finish it. I get about half way done and its overkill and time to stop. Every time. Not complaining though-my wide load butt surely doesn't need the whole thing.


I managed to clean out my car this afternoon too and do the windows. The fingerprint art work on them was horrendous.


Picked up Red from school later in the afternoon and we spent about an hour hand turning and raking the dirt in a 8x10 plot next to the house. I was going to start on the opposite side of the house-but this side has virtually no grass growing in this section so it won't require the use of a tiller. that will save me a little bit of money. We have so much rock in our soil its ridiculous-I would hardly call it soil...its pretty much clay and rocks.


I decided we need to get a chain saw and cut down some of the smaller trees right in that area too since there are a couple that are uncomfortably close to the house. I'll have to try and get Tracy to work on that next weekend. It will reduce the shade hours in that section of the yard too-which will be good for the garden.

There's tons of rain in the forecast this weekend so I won't be able to apply my grass and weed killer around the garden plot. I'll probably just get out there and keep working the soil. I need to go ahead an build the the border with some landscaping timbers. I'm guessing I will have to dig a small trench of sorts so that the timbers will settle and rest in the ground.


I got in a quick workout with the bag tonight. Its always best to listen to something hardcore and angry when working the bag-either that or super high energy techno. It just makes the workout that much better.


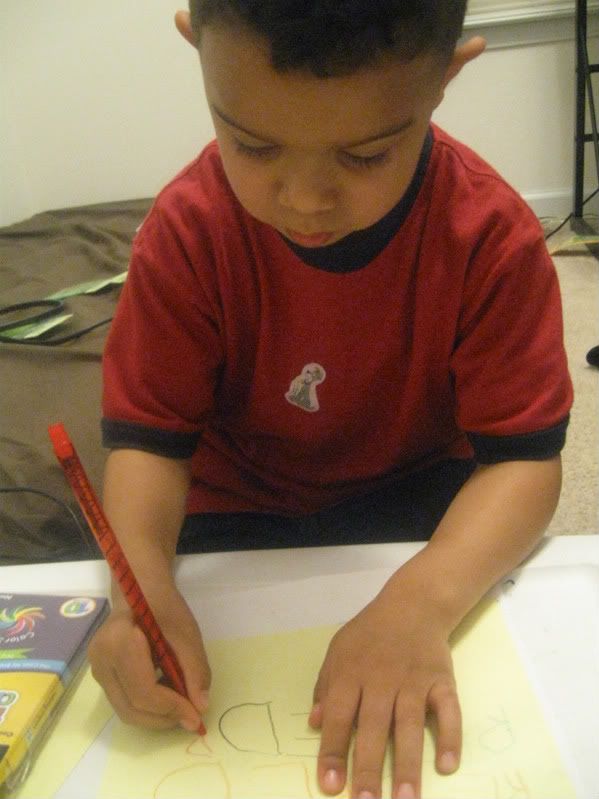
Red and I spent the rest of the evening making salmon patties and mac and cheese and salad and drawing pictures and practicing writing letters. He showed me (wink, wink) how to make a rainbow and informed me that I need more practice making rainbows because I don't use enough colors on my rainbows.


Wednesday, February 25, 2009

Pork with Apples and Pierogies: Memories of Home

We all have a favorite (or favorites in my case) comfort food. Its usually something that reminds us of being a kid and takes us back to our Mom's or Grandmom's kitchen. For me comfort foods tend to be creamy or cheesy and full of carbs. Pierogies are definitely on my list. They are big in Northeastern Ohio, where I grew up. There are alot of Eastern European roots in that area and pierogies can be found at tons of mom and pop restaurants.

I've yet to find them down here except for a variety sold in the frozen section at the grocery store.

I pulled out some boneless pork chops the other night and saw the pierogies in there and figured they 'd go well together. I started searching for a recipe online and came across one that included both pierogies and chops. There was also apple and onion so I knew it was going to be a winner.
I adjusted it a bit. The recipe called for bone in chops-I used boneless chops that I cut into strips and I added a bit of parsley for some color. I also used olive oil instead of butter. They were delicious and I really think I could have eaten the pieorgies alone without the pork. Simple delicious comfort food.

Pork Chops N Pierogies

INGREDIENTS
8 frozen potato and onion pierogies
2 (3/4 inch) thick bone-in pork loin chops
1/2 teaspoon salt, divided
1/2 teaspoon pepper, divided
4 tablespoons butter, divided
1 medium sweet onion, sliced and separated into rings
1 Golden Delicious apple, cut into 1/4 inch slices
1/4 cup sugar
1/4 cup cider vinegar


Cook pierogies according to package directions. ***I like to saute/stir fry my pierogies rather than boil them***


Meanwhile, sprinkle pork chops with 1/4 teaspoon salt and 1/4 teaspoon pepper. In a large skillet, cook chops in 2 tablespoons butter over medium heat until juices run clear; remove and keep warm.


In the same skillet, saute onion in remaining butter for 3 minutes. Add apple; saute until almost tender.


Stir in the sugar, vinegar, and remaining salt and pepper. Bring to a boil. Reduce heat; simmer, uncovered, for 5 minutes. Add pork chops and pierogies to skillet; stir to coat.


Thursday, February 19, 2009

Friday's Happy Clips and Garden Snips


Friday Happy Clips...

Gots-ta love Pre-schooler artwork! I have binders full of artwork from the first 4 years of this child's life. The hardest part is deciding what to keep and what to toss. I just want to keep every little scribbled on paper he makes. This one is a definite keeper and makes me giggle. Its called "Dog Chasing Cat"-I have to wonder about the blank look on the striped dogs face. He doesn't seem too terribly excited about "chasing" this 6 legged cat. The cat looks thoroughly annoyed. Maybe I'll mat and frame this one, it makes me giggle every time I look at it.


And the silly little artist who created this fabulous work of art-well, we can not forget him. He was full of happiness this week. This, after Satan himself invaded and took over his little body over the weekend. HOLY 4 YEAR OLD ATTITUDE! I was on the verge of entering the land of "Mommie Dearest"with this child this weekend. It WERE NOT purrty folks, not purrty at all. Alas, my happy silly and angelically behaved little boy is back and has rebuked the devilish ways of yester-weekend.


Garden Snips...


Here's the garden plan for this year:

One 5 ft in diameter circular sectioned herb garden (IF I can find FREE or next to nothing bricks) IE, an Herb Wheel.

One 8x10 foot vegetable garden.

"Salad Bowl" window box


Herbs:

Rosemary

Cilantro

Dill

Basil

Chives

Thyme

Mint


Veggies:

Tomatoes-three varieties including one yellow tomato

Corn

Cabbage

Broccoli

Carrots

Yellow Squash and Zucchini

Pole Beans

Cucumbers

Red leaf lettuce

Bibb Lettuce

Dandelion Greens


Supplies Needed:

Mid turn tiller (RENT $35)

Twine (already have on hand)

Bricks (HOPEFULLY FREE)

landscaping timbers, 2x?? ($20)

Stakes ($10)

Plastic fencing roll ($10)

Organic Topsoil-probably about a yard and a half ($35)

Mulch ($20)

Trellis of some sort ($10)

Zip ties (already have on hand)

Irrigation drip style hose ($10)

Starter pod trays (already have on hand)

~~~~~~~~~~~~~~~~~~~~~~~~~~~~~~~~~~~~~~~~~~~~~~~~~~~~~~

I can't wait to get started, I'll probably start marking off and digging up the plots outside and plant the seeds indoors in the starter trays this weekend. I have to pick up a few more seed packets and some herb plants over the next few weeks.

I might fore go building the rain barrel-just depends on what the cost is going to be for the supplies to actually make one.